
2022-04-05T10:45:55
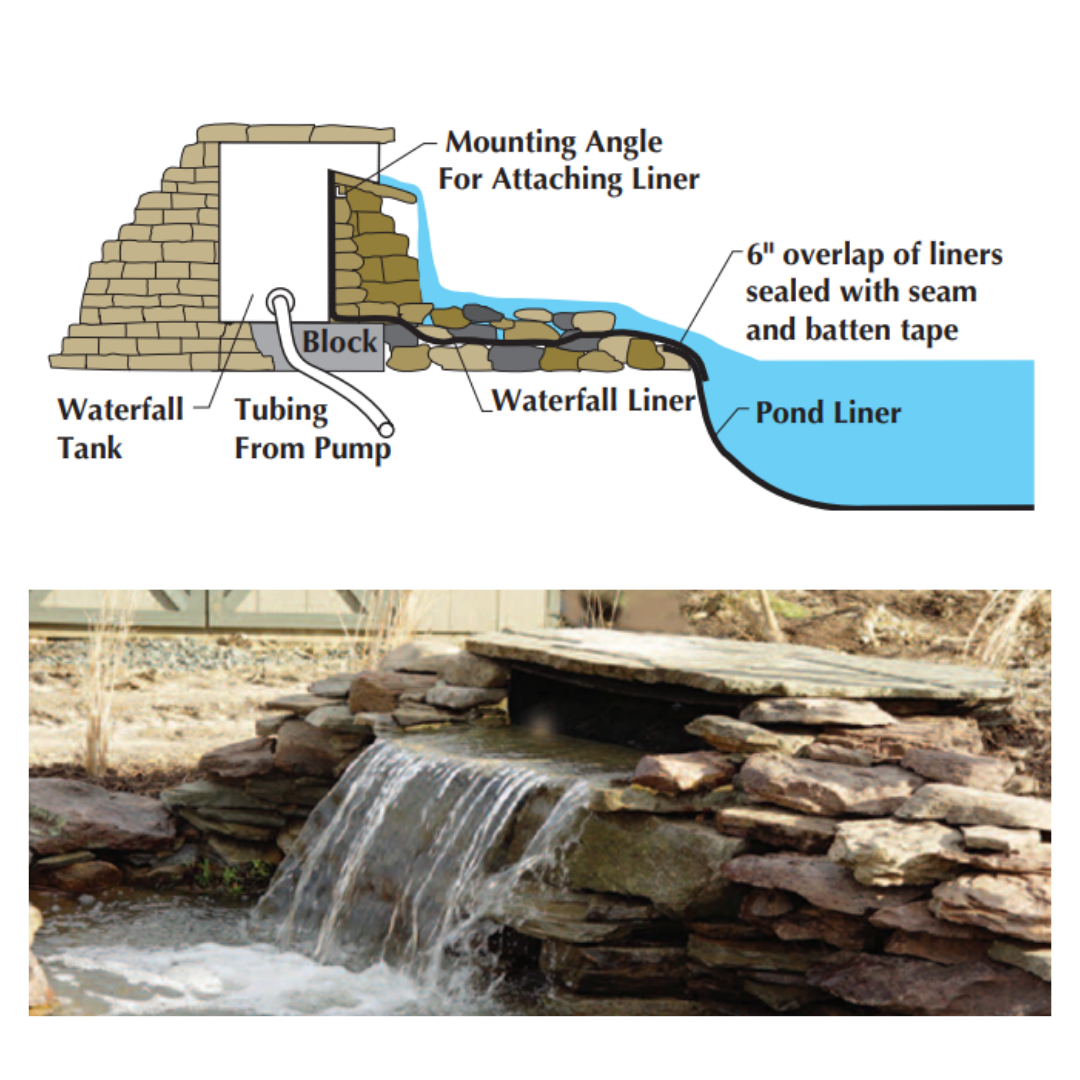
Waterfall Construction Tips 1. A waterfall tank serves as a header pool for the waterfall. It should be placed on a solid and level surface such as concrete blocks. Water can be plumbed in through the bottom of the tank via a bulkhead and hose barb fitting. Bring the waterfall liner up to the mounting angle below the spillway and secure thoroughly by bolting to the tank. 2. Where the waterfall is to spill into the pond, there should be at least 15" of rubber liner from the pond to overlap the waterfall liner. At this point the grade must slope towards the pond or water will back up and get between the liners. We recommend using a seam and batten tape to seam the two liners together to make the seam watertight. 3. Use a nice flat and wide rock as your first spillway stone Stack a rock wall in front of the tank to support this stone under the tanks spillway. The front edge of this stone should be level from side to side and slant down slightly. 4. Use an expandable foam insulation to seal rocks to the liner and prevent water from running behind or between rocks in the main course of the waterfall. This can be purchased in spray can form in most hardware and building supply stores. Be sure to use this sparingly since it expands tremendously. Exposed foam can be camouflaged by sticking pebbles, rock chips or sand into it while it is still tacky. 5. To prevent any possible water leakage make sure you keep the rubber liner up high enough on the sides to contain the waterfall. It's a good idea to test the waterfall before totally covering the edges of the liner to check for any possible leaks.
Have a question? Ask here!
Required fields are marked *